

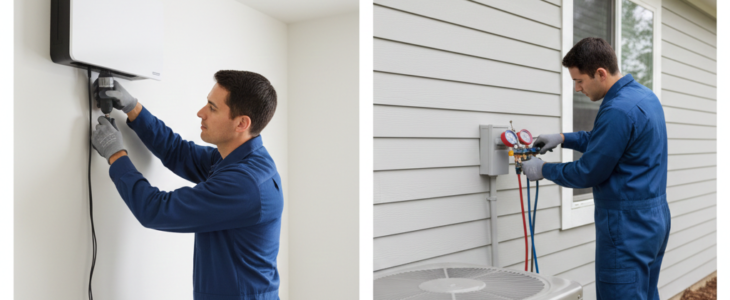
Installing A Zoned Cooling Solution can change how a house feels during warm months. Instead of running a single system at full tilt to cool the whole building, zoned setups let you target specific rooms or areas. That reduces wasted run time, keeps occupants more comfortable, and gives you tighter control over temperatures in bedrooms, living rooms, and home offices.
In this article I walk through why homeowners pick zoned cooling, what equipment you will encounter, clear steps for a successful installation, cost and energy considerations, common challenges, and simple maintenance tips that keep the system running well. Whether you are planning a professional installation or want to understand the process before hiring a contractor, these practical insights will help you make informed choices.
Why homeowners choose zoned cooling systems for comfort and savings
Zoned cooling separates a house into distinct areas that can be cooled independently. Common reasons for choosing a zoned approach include different temperature preferences among household members, rooms that are used irregularly, and parts of the home that gain extra heat from sun exposure. For example, a south facing living room may need cooling in the afternoon while bedrooms remain comfortable until evening.
Another motivation is cost control. By cooling only occupied areas, many households see lower energy consumption compared with running a central system at one setpoint for the whole house. This is especially true for homes with poor insulation or inconsistent ductwork where central systems struggle to deliver comfort evenly.
Basic components of a zoned cooling solution
A zoned cooling arrangement may use ducted or ductless technologies, and understanding the major components helps when planning an installation.
- Outdoor compressor This is the heart of the system that provides refrigerant and cooling power. One outdoor unit can sometimes serve multiple indoor units.
- Indoor units Ductless systems use wall mounted, cassette, or floor console units inside rooms. Ducted systems use dampers inside ducts to control airflow to each zone.
- Control devices Thermostats or wireless controllers allow zone by zone temperature settings. Smart scheduling is possible without overcomplicating daily use.
- Refrigerant lines or ductwork Ductless setups require small linesets between the outdoor and indoor units. Ducted systems need functional ducts and electrically controlled dampers.
Indoor unit options and placement tips
Choose an indoor unit type based on room layout. Wall mounted units work well in bedrooms and offices. Ceiling cassette units are unobtrusive for larger living spaces. Placement matters: mount units where airflow can circulate freely and avoid placing them directly above electronics or delicate finishes.
Outdoor unit sizing basics
Match the outdoor unit capacity to the combined load of the indoor units it will serve. Oversizing leads to short cycling and humidity problems. Undersizing forces constant operation and poor comfort. A qualified technician will calculate load by evaluating square footage, insulation levels, window sizes, and sun exposure.
Steps for installing a zoned cooling solution
Installing A Zoned Cooling Solution follows a predictable sequence whether you choose ductless mini splits or a ducted zoning system. The following steps outline the typical process and what to expect on installation day.
- Site survey and load calculation A technician inspects the home to measure rooms, review insulation, and note heat gain from windows. This determines the capacity needed for each zone.
- Select equipment Pick indoor unit styles, an outdoor compressor sized to the combined load, and controls that match how you use each space.
- Plan placement and routes For ductless setups, identify routes for refrigerant lines and power. For ducted systems, map where dampers and control wiring will go.
- Install indoor units Mount units, run linesets or ducts, and connect control wiring. Technicians typically drill small holes for lines that are sealed after installation.
- Install outdoor unit Place the compressor on a concrete pad or bracket. Connect refrigerant lines, vacuum the lines to remove moisture, and charge the system as required.
- Test operation Run the system through all zones, test thermostats, and check refrigerant pressures and airflow. Technicians also check for leaks and confirm control responses.
If you prefer a professional approach, look for experienced contractors who specialize in mini split work. For those researching providers, a reputable resource that explains mini split installations in detail is available at zone cooling system install.
Common installation challenges and how to handle them
Installations usually go smoothly, but certain issues can arise. Awareness helps you avoid delays and surprises.
- Line routing in tight spaces Older homes or complex layouts can make it difficult to run lines without cutting through finished surfaces. Discuss routing options and any cosmetic repairs before work begins.
- Electrical capacity Some homes require a dedicated circuit for the outdoor unit. An electrician may need to upgrade the panel or add breakers, which adds time and cost.
- Ductwork problems For ducted zoning, leaky or undersized ducts can limit benefits. Sealing and balancing ducts may be necessary to get the intended results.
- Condensate drainage Indoor units create condensate that must be routed to a drain. Improper drainage causes water damage. Verify the path and slope for condensate lines during planning.
Handling refrigerant and warranty concerns
Refrigerant handling requires technicians with proper certification. Ask your installer about warranty coverage for both parts and labor and about the procedures they use for charging and leak testing.
Dealing with homeowner expectations
Set realistic expectations about how quickly zones will reach target temperatures. Mini split systems may take time to lower a room after long periods of heat gain. Good placement and correct sizing reduce that recovery time.
Energy savings and cost considerations
Zoned cooling can reduce energy use if installed and used properly. Savings depend on how often you cool unused rooms, the efficiency ratings of the chosen equipment, and the quality of the installation.
- Initial costs Ductless systems typically cost more per ton than central systems because multiple indoor units are needed. Ducted zoning adds complexity with dampers and controls.
- Operating costs When you cool selected areas instead of the whole house, operating hours drop. In practice, households report varied savings depending on behavior photo. The more you isolate cooling to occupied spaces, the greater the potential savings.
- Equipment efficiency Look for high SEER and HSPF ratings on mini split systems. Higher efficiency units cost more up front but lower monthly bills. Consider payback timelines when selecting equipment.
Tips for maintenance and long term care
Routine maintenance keeps zoned cooling systems running reliably. Many tasks are simple and can be done by the homeowner while others should be scheduled with a technician.
- Clean or replace filters regularly. Clogged filters reduce airflow and increase runtime.
- Keep indoor unit coils and outdoor condenser fins free of debris. Light brushing and vacuuming prevent airflow restrictions.
- Check condensate drains for clogs and verify that condensate pumps function if used.
- Schedule annual professional checks that include refrigerant verification, electrical inspections, and system performance checks.
Simple seasonal checks
Before summer starts, run the system and confirm each zone responds to its controller. Resolve odd sounds, poor airflow, or temperature drifts promptly to avoid higher repair costs later in the season.
When to call a professional
If you notice refrigerant odor, frequent short cycling, or unexplained high energy bills, contact a licensed technician. These signs often point to system faults that require specialized tools and training.
Installing A Zoned Cooling Solution is a practical route to targeted comfort and more efficient use of cooling energy. A successful project starts with a careful load assessment, correct equipment selection, and attention to placement and drainage. Whether you pick ductless mini splits or a ducted zoning scheme, follow best practices for sizing and routing to get the performance expected. Routine maintenance and periodic professional checks keep the system performing across seasons.
Ready to move forward? Gather measurements for each room you want to zone, note special conditions like high sun exposure and poor insulation, and reach out to licensed contractors for detailed estimates. Ask for a written scope of work that covers system sizing, placement, electrical needs, and warranty details. If you want a resource that explains professional mini split installation options, including step by step descriptions and common setup types, the linked page above provides helpful background on what to expect.
Taking these steps helps you get the most from a zoned cooling approach. A planned installation delivers consistent comfort where you need it and can lead to sensible reductions in energy use. Contact a qualified provider to schedule a site survey and start planning a zoned layout that fits your home and daily routines.